Adding Remarketing Codes:
- Login to Entrata
- Click on Websites, then select Settings
- Select the property you'd like to add the remarketing code to in the left hand column
- Add the entire remarketing code to the Statistics Javascript section, being sure not to remove any other codes from that section
- Click Save
Adding Email Conversion Tracking:
- If you don’t have a Google Tag Manager account you will need to
create one: https://www.google.com/analytics/tag-manager/
- Add a New Account:
- Setup Account = Company Name
- Setup Container
- Container name = Property Name
- Where to use container = Web
- Click Create
- The Install Google Tag Manager box will pop-up. Copy just the code from GTM to the last number/letter in the quotation marks (ie - GTM-ABT7KJ3)
- Login to Entrata
- Click on Websites, then select Settings
- Select the property you'd like to add the email conversion tracking code to in the left hand column
- Scroll down to the Google Tag Manager Key section and paste the GTM code in the box
- Click Save
- Navigate back to Google Tag Manager
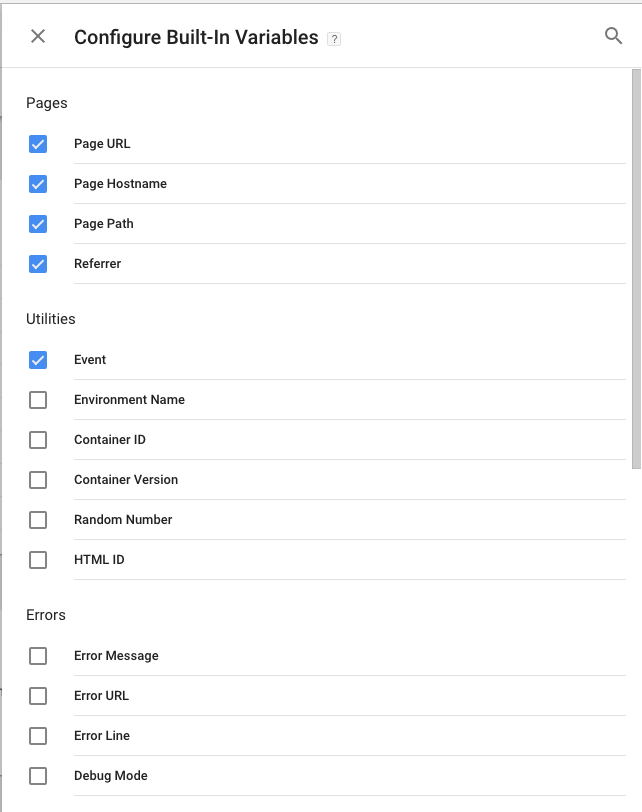
- Go to the Variables tab, click Configure under Built-In Variables and select the following:
- Under Pages:
- Page URL
- Page Hostname
- Page Path
- Referrer
- Under Utilities:
- Event
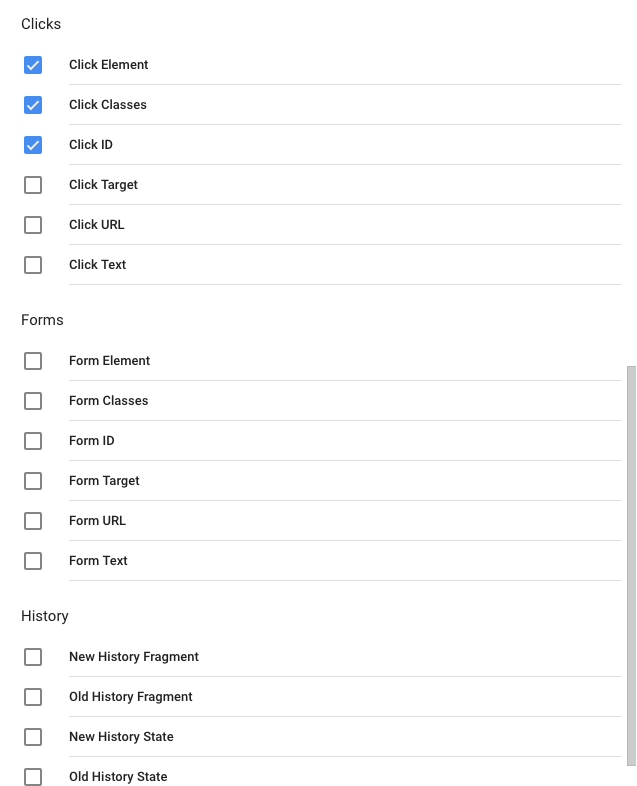
- Under Clicks:
- Click Element
- Click Classes
- Click ID
- Click the Tags tab on the left and select New.
- Up at the top where it says Untitled Tag, name the tag Guest Card
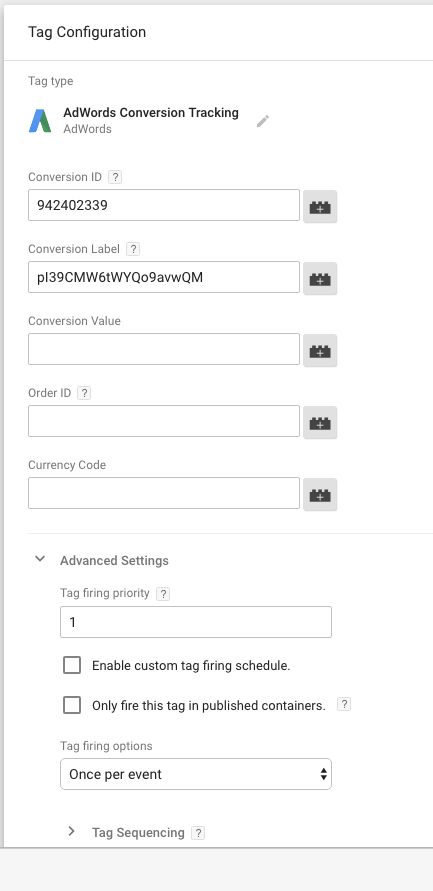
- Click the Tag Configuration section
- Choose a Tag Type: AdWords Conversion Tracking
- Tag Configuration
- Conversion ID (just the numbers from this line of code: var google_conversion_id = 942402339
- Conversion Label (just the letters & numbers from this line of code: var google_conversion_label = "pI39CMW6tWYQo9avwQM";
- Conversion Value: leave blank
- Order ID: leave blank
- Currency Code: leave blank
- Click Advanced Settings
- Tag firing priority: 1
- Tag firing options: Once per event
- Click Triggering
- Choose a trigger > click the + sign in the upper right hand corner
- On the upper left hand corner where it says Untitled Trigger, name the trigger Guest Card Submit
- Click Trigger Configuration
- Select All Elements under Click
- This trigger fires on = Some Clicks
- Under Fire this trigger when an Event occurs and all of these conditions are true
- First dropdown: Click Classes
- Second dropdown: contains
- Third box enter: btn submit js-submit
- Click Save in the upper right hand corner
- Click Save again
- Click Submit