
The following steps can be used to guide yourself through adding our Chatbot script to your Realpage website. Once you've logged into your account, please follow these steps to add Chatbot.
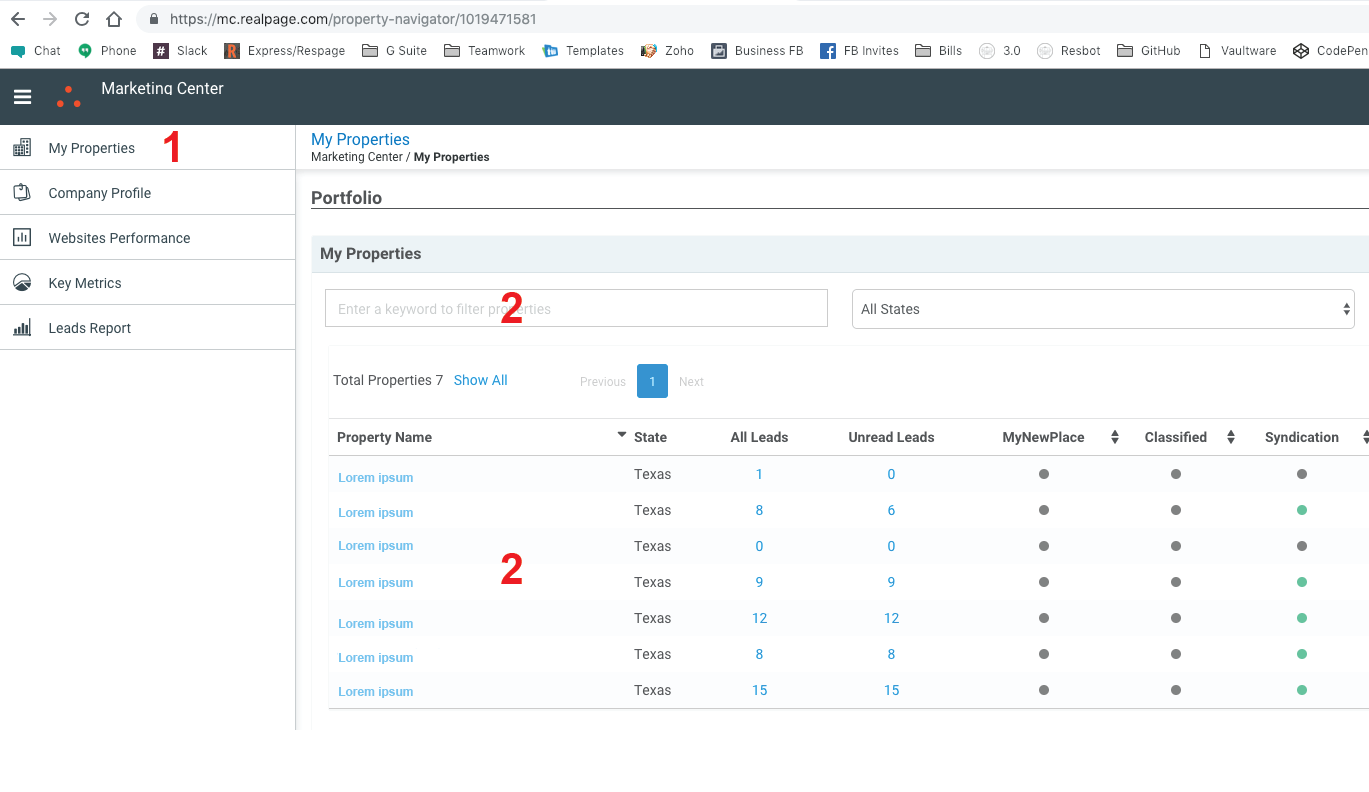
1. Click on the My Properties Menu option on the left
2. You can then either use the filter or go through your property list to locate the property you wish to add the Chatbot to and then click on it
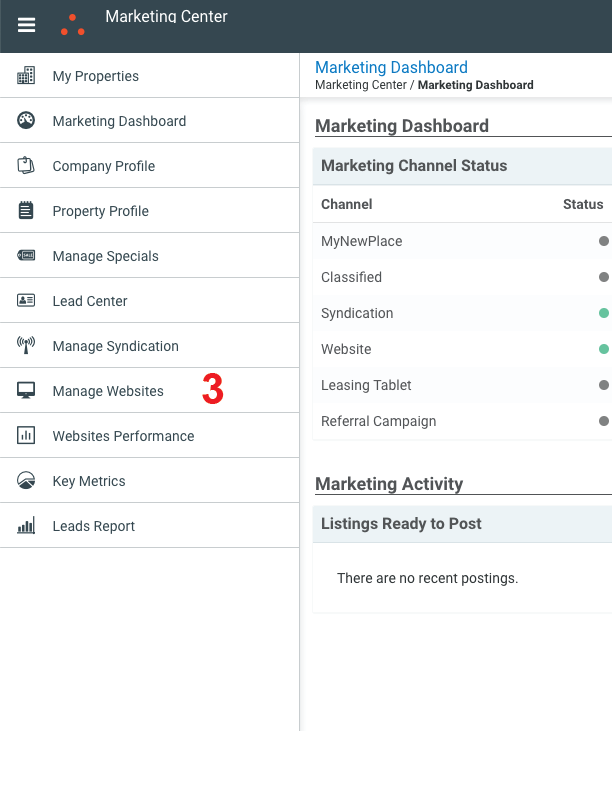
3.Once you select your property you'll be navigated to a new page, here you'll want to select Manage Websites from the left menu
4. From the Websites menu, you'll want to click on the Pages menu on the left to expand it out
5. Click on the General page to access its configuration options

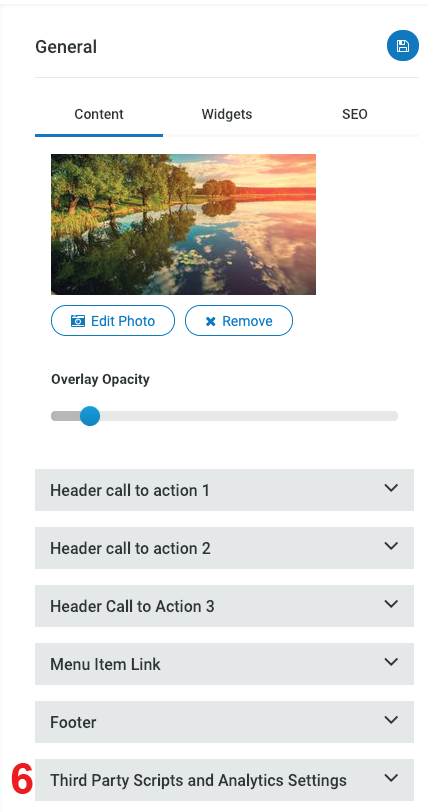
6. Directly to the right of the menu you'll have options for editing the General page now, scroll to the bottom of this panel until you see Third Party Scripts and Analytics Settings and click on it to expand it.
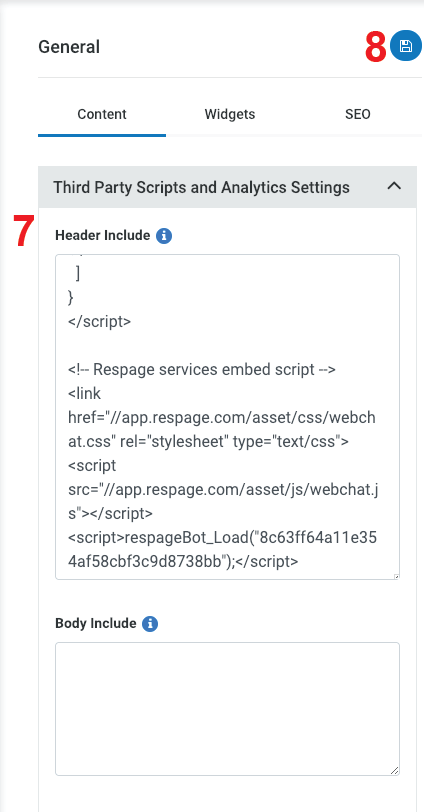
7. Once expanded you'll be able to scroll down further and see the Header Include Box. Click in this box and scroll / arrow down to the bottom of any existing codes that are already here. Once you are at the bottom, enter a couple spaces below the last entry and then paste in the Chatbot Embed Script.
8. Click the Save Button.
9. Once saved you can click the preview button and a new window will pop up with your website showing how the saved code will look, you should see the Chatbot appear in the bottom right hand corner after a couple of seconds meaning that the code was added correctly. If you do not see it you can reach out to Respage or contact Realpage for support. Assuming your Chatbot appeared as expected you can close the new window and then click Publish back on the Websites page to make the Chatbot live on your website.
